
How to Add a Vendor to a Case
Getting the right rep in the room starts with a vendor request. Casechek lets you assign vendor support directly from the case, specify exactly what's needed, and notify the rep automatically — so nothing falls through the cracks and everyone has what they need before the procedure begins.
You can add vendor support directly from the case details page.
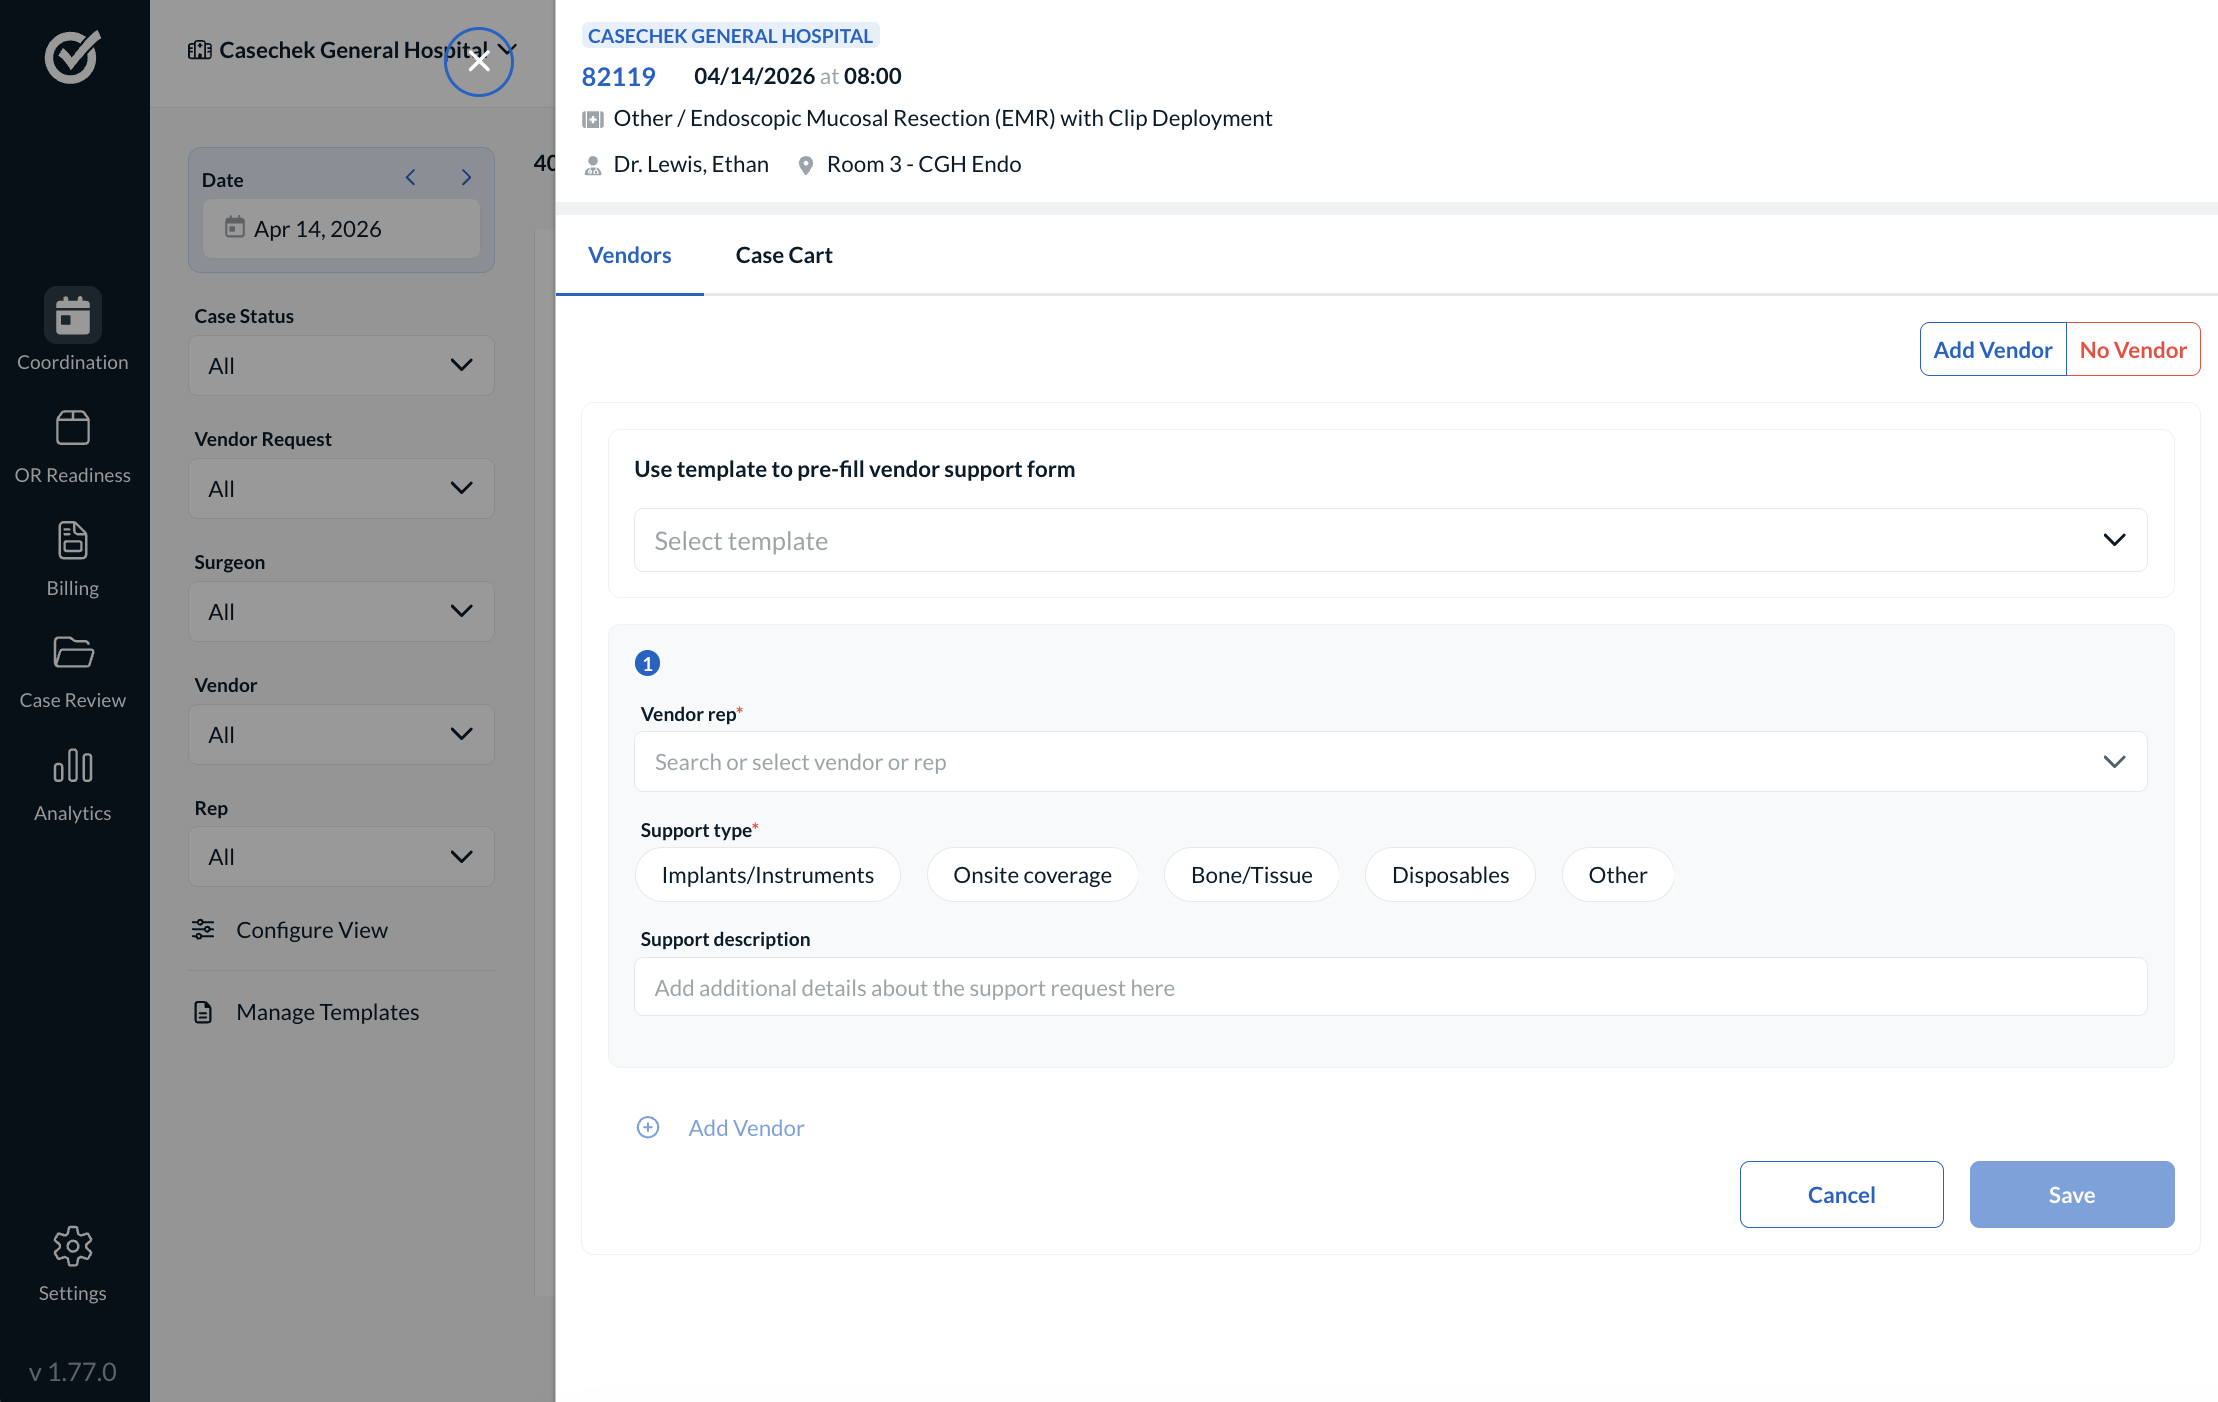 To add a vendor request:
- Open the case
- Select Add Vendor
- (Optional) Apply a template to prefill information
- Select the vendor representative
- You may search by name or vendor name to find the correct vendor rep
- Choose the support types needed for the case:
- Implants/Instruments
- Bone & Tissue
- Disposables
- On-Site Coverage
- Other (requires a description)
- Add a description (optional unless Other is selected)
- Click Save
Once saved, the vendor rep will receive an email notification and the case request will appear in their Casechek mobile app.
Editing a Vendor Request
You can edit a request as long as it is still Pending.
Open the case, select the vendor request, update the support details, and save. The vendor will be notified of the change.
Canceling a Vendor Request
You may cancel a request at any time. To do so, open the case, locate the vendor request you want to cancel, click on the menu (three vertical dots) and select Cancel Request. Once canceled, the request is removed from active tracking and the vendor is notified.